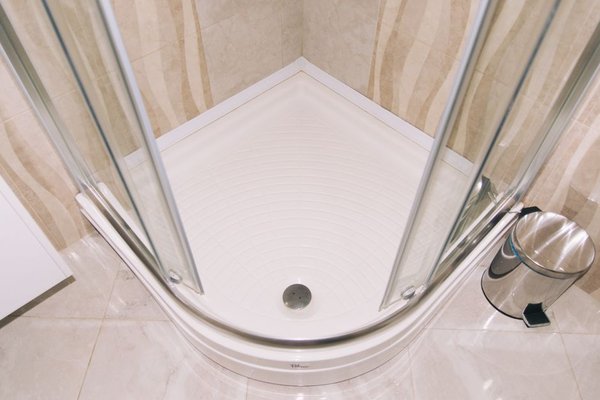
A freshly tiled bathroom can look perfect while hiding its most important layer. Waterproofing sits behind the finish, protecting plaster, flooring and timber from water that finds its way through joints and corners. In a UK renovation, deciding where that protection belongs should happen before the tiler starts, not after a leak appears.
This bathroom waterproofing guide covers the wet areas that need attention, how bathroom tanking systems work and what to inspect before tiles and sanitary fittings conceal the work.
Why tiles and grout are not enough
Porcelain and ceramic tiles resist water, but a tiled surface includes grout lines, corners and openings around pipework. Water-resistant grout is not necessarily watertight, while silicone joints can deteriorate or separate as materials move.
Water reaching the background may damage plasterboard, timber and neighbouring rooms long before a stain becomes visible. A suitable waterproof membrane forms a protective layer beneath the finish. It works alongside sound plumbing, suitable adhesives and ventilation rather than replacing them.
Where does a bathroom need waterproofing?
Shower enclosures and bath showers
Walls receiving direct shower spray are the clearest priority. Shower waterproofing should cover the appropriate wet surfaces and deal continuously with corners, pipe penetrations and the connection to the tray. The required extent depends on the enclosure and chosen system.
A shower over a bath also exposes the surrounding tiled walls to repeated wetting. The seal beside the bath rim is a maintenance joint, not a substitute for waterproof protection behind tiles.
Wet rooms and level-access showers
In a wet room, water can travel beyond the immediate shower area. The waterproofed floor, adjoining walls and drain need to work as one system. Drain connections are especially vulnerable unless the waterproofing is integrated with a compatible flange or detail.
The floor also needs correctly designed falls towards the drain. Tanking prevents water entering the structure; it cannot correct a floor that directs water away from the outlet.
Other floors and walls
A painted wall away from splashing does not face the same exposure as a shower wall. Similarly, a conventional bathroom floor may have different requirements from a wet-room floor, depending on its construction, use and system specification.
Before requesting quotes, mark where direct spray, repeated splashes and possible overflow will occur. This simple wet-area map makes the intended scope easier to agree with an installer.
Which bathroom tanking system should you choose?
Liquid-applied membranes are spread across a prepared background, usually with specified reinforcement at junctions. Sheet membranes form a waterproof layer with sealed overlaps. Proprietary watertight boards can also be used as part of an approved system when their joints and fixings are treated correctly.
Choose for compatibility, not convenience alone. The product must suit the wall or floor substrate, expected exposure, tile loading and chosen adhesive. Confirm that matching primers, tapes, pipe collars and drain components are available.
Moisture-resistant plasterboard is not automatically waterproof. Nor is mixing unrelated manufacturers’ components a safe shortcut unless the system documentation allows it. The vulnerable places are often the connections, not the centre of a wall.
Wet area preparation before tiling
Wet area preparation begins with a sound, stable and suitably dry background. Repair active leaks, loose plaster, damaged boards and moving floor sections before covering anything. A coating will not make a weak structure reliable.
Complete plumbing changes, floor reinforcement and any required tile-backer installation first. Then follow the waterproofing manufacturer’s instructions for cleaning, priming, application thickness and drying conditions. These vary considerably between products.
Plan shower controls, pipework, niches and future fixings before the membrane is installed. Each opening needs an approved sealing detail. Avoid drilling through a finished waterproof layer wherever possible.
How waterproofing is fitted
Although methods differ, the sequence is broadly consistent. Prepare and prime the background where required, fit the specified corner tapes and penetration collars, then install the membrane. Liquid products may need multiple coats at stated coverage rates; sheet products need correctly sealed joints and overlaps.
Connect the system to the shower tray or wet-room drain using the manufacturer’s approved method. Ordinary silicone alone should not be relied upon as the hidden waterproof junction.
Allow the assembly to cure as directed, inspect the finished layer and perform any specified water test before tiling. Only then should compatible adhesive, tiles and grout be applied. Visible flexible sealant comes later and will need maintenance over time.
An upstairs shower renovation: what to check
Suppose a homeowner removes an old shower tray and finds soft plasterboard near a corner. Painting tanking over that damaged area would conceal the symptom rather than cure the cause. The affected board should be replaced with a suitable background, while the tray, waste and plumbing connections are investigated.
Before new tiles go up, ask to see the sealed corner, shower valve penetrations and tray junction. Photograph the waterproofed surfaces and product labels. These records help establish what was installed if a future repair becomes necessary.
A bathroom renovation planning checklist is useful here: waterproofing should have its own inspection stage between plumbing preparation and tiling, rather than being treated as a last-minute coating.
What UK standards and guidance say
BS 5385-1:2018 recommends protecting substrates in wet tiled areas, such as showers and wet rooms, with a suitable proprietary tanking membrane system. The Tile Association also explains that water-resistant grout and adhesive do not replace waterproofing. This industry guidance should not be confused with a blanket statutory requirement to tank every surface in every home.
NHBC requirements may also apply to certain warranty-covered projects. For an existing renovation, establish the appropriate system with the installer and check any relevant building control or warranty conditions separately.
Bathroom ventilation and condensation control remains important, but extraction removes airborne moisture; it does not stop shower water penetrating an inadequately protected wall.
Warning signs before the tiles go on
Look out for unsealed corners, missing pipe collars, unsuitable substrates, incompatible materials and poor drainage falls. A quote promising only a “waterproof shower” without naming the system, coverage and tray connection leaves important questions unanswered.
If planning a floor replacement, choosing bathroom floor tiles should follow decisions about the substrate, drain position and waterproofing build-up, not drive them.
Frequently asked questions
Do I need tanking behind shower tiles?
Yes. UK tiling guidance recommends a suitable tanking system in wet tiled shower areas. Tiles, grout and silicone should not be the only defence against water entering the wall.
Can I waterproof over existing tiles?
Only where a particular system expressly permits that application and the existing finish is sound. Removing tiles may be necessary to find hidden damage and prepare a suitable background.
Is waterproof tile-backer board enough?
Not always. Some boards are merely water-resistant. Even proprietary watertight boards need approved treatment at seams, screws and penetrations.
How long does tanking take to dry?
There is no universal waiting period. Follow the product’s instructions for coats, curing, temperature and humidity before tiling.
Protect the room before finishing it
Reliable bathroom waterproofing comes from continuity: a suitable membrane on a stable background, carefully connected at corners, drains and fittings. Identify the wet areas early, agree the complete system and inspect it before concealment. Those checks can prevent an attractive renovation becoming an expensive repair.